Dieline definition: A dieline in packaging is a flat template that outlines the precise cuts, folds, and edges needed to create a finished package design.
When you’re designing the perfect packaging for your product, how can you ensure it works in the real world? And when it’s time to produce it, how do you make sure the factory brings your vision to life exactly as you imagined?
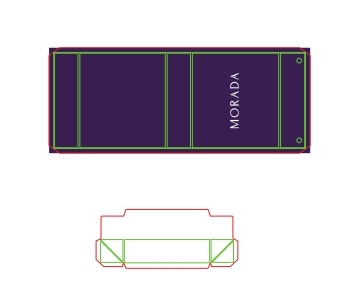
This is where dielines come in, they are like blueprints for packaging, showing exactly how the finished product will look when it’s flat.
Dielines make sure everything lines up perfectly when the package is assembled. Without a proper dieline, packages might not fold right or have misaligned graphics.
In this article, let’s explore what is a dieline and how to create it for packaging production.
Key Takeaways
- Dielines are templates that outline the layout and dimensions of packaging designs.
- They help prevent production errors and ensure proper assembly.
- Dielines apply to various packaging types and are essential for quality control.
- Simply provide the measurements, and WITPAX will handle the rest.
What is a Dieline in Packaging?
A dieline is a template used in packaging design that shows where to cut, fold, and glue a package. It’s like a map for creating boxes, containers, and other packaging items.
We use dielines to plan out the structure of packaging before it’s made. This saves time and money by catching problems early. Dielines also help us communicate design ideas clearly
between different teams working on a project.
Components
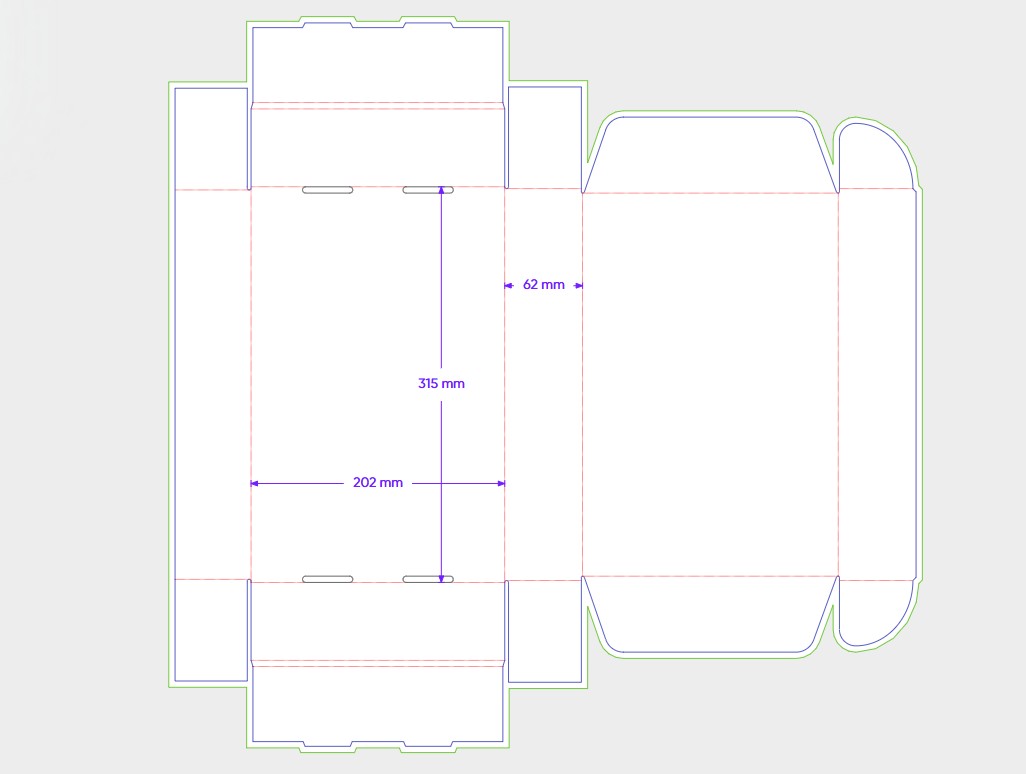
Dielines have several key parts:
- Cut lines: Show where to cut the material
- Fold lines: Mark where to bend or crease
- Glue areas: Indicate where adhesive should be applied
- Bleed areas: Extra space for graphics that extend past the cut line
- Safe zones: Areas where important design elements should be placed
Why Need a Dieline for Packaging
Dielines play a crucial role in packaging design. They help us:
- Visualize the final product
- Ensure proper fit and function
- Plan graphic placement
- Avoid production errors
We use dielines to test different package shapes and sizes. This lets us find the best design for a product. Dielines also help us place logos, text, and images in the right spots on the package.
By using dielines, we can spot and fix issues before production starts. This makes the packaging process smoother and more efficient. Dielines are key to creating packages that look good, protect products, and work well for customers.
How to Create Dielines?
Dielines are crucial for packaging design, acting as a blueprint for the final product and guiding production. We’ll cover the tools, considerations, and specifications needed to make effective dielines.
Software and Tools
Adobe Illustrator is a top choice for dielines, offering precise control. Other tools include CorelDRAW and AutoCAD. Start by setting up a document with correct dimensions and layers for cut and fold lines. The pen tool outlines the package.
Design Consideration
Materials impact folding and cutting, and different materials may require wider fold lines.
Leave space for bleed and trim to ensure the printed design aligns correctly.
Technical Specifications
Accuracy is critical in dieline creation.
Use a 1:1 scale for precision.
Cut lines are typically 0.25-0.5 points thick, while fold lines are thinner (0.15-0.25).
File Format
Save dielines as vector files (AI or PDF) for scaling without quality loss.
Tips to Prevent Dieline Mistakes
When working with dielines, certain issues tend to pop up frequently. Here’s how to address and avoid them:
- Verify Measurements: Double-check all dimensions to ensure accuracy.
- Use Correct Color Profiles: Ensure color settings match production standards.
- Confirm with Manufacturer: Validate the dieline with your manufacturer before finalizing.
- Check Alignment: Make sure all design elements are properly aligned.
By following these steps, you can avoid common production errors and streamline the packaging design process.
WITPAX Creates Dielines For You
To get started, simply provide the measurements of your box, and our team will create a dieline for you within 48 hours.
Here’s what you need to do:
- Provide the Box Measurements: You can check here for a guide on how to take accurate box measurements.
- Choose the Packaging Type: Select the packaging type—rigid box, corrugated box, or folding carton.
- WITPAX Creates the Dieline: Once we have the measurements, our experts will generate a precise dieline within 48 hours.
Accurate measurements—such as length, width, height, and special features like windows or handles—are crucial for creating a precise dieline.
Double-checking these details helps prevent costly mistakes. Our packaging experts then use specialized software to create the dieline, ensuring it meets your specifications.
Once we have the measurements, we can work with packaging experts to create the dieline. They use specialized software to draw the lines and add important details.
After you confirm the dielines, we can produce physical mock-ups to check the design’s feasibility.
Wrap Up
Creating a dieline is an essential step in packaging design, ensuring the final product is functional, visually appealing, and error-free.
With the right tools and attention to detail, you can prevent costly mistakes in production.
At WITPAX, we’re here to guide you through the dieline process, from initial measurements to final approval.
Let us handle the technical side, so you can focus on what matters most—your product.